

Open Members
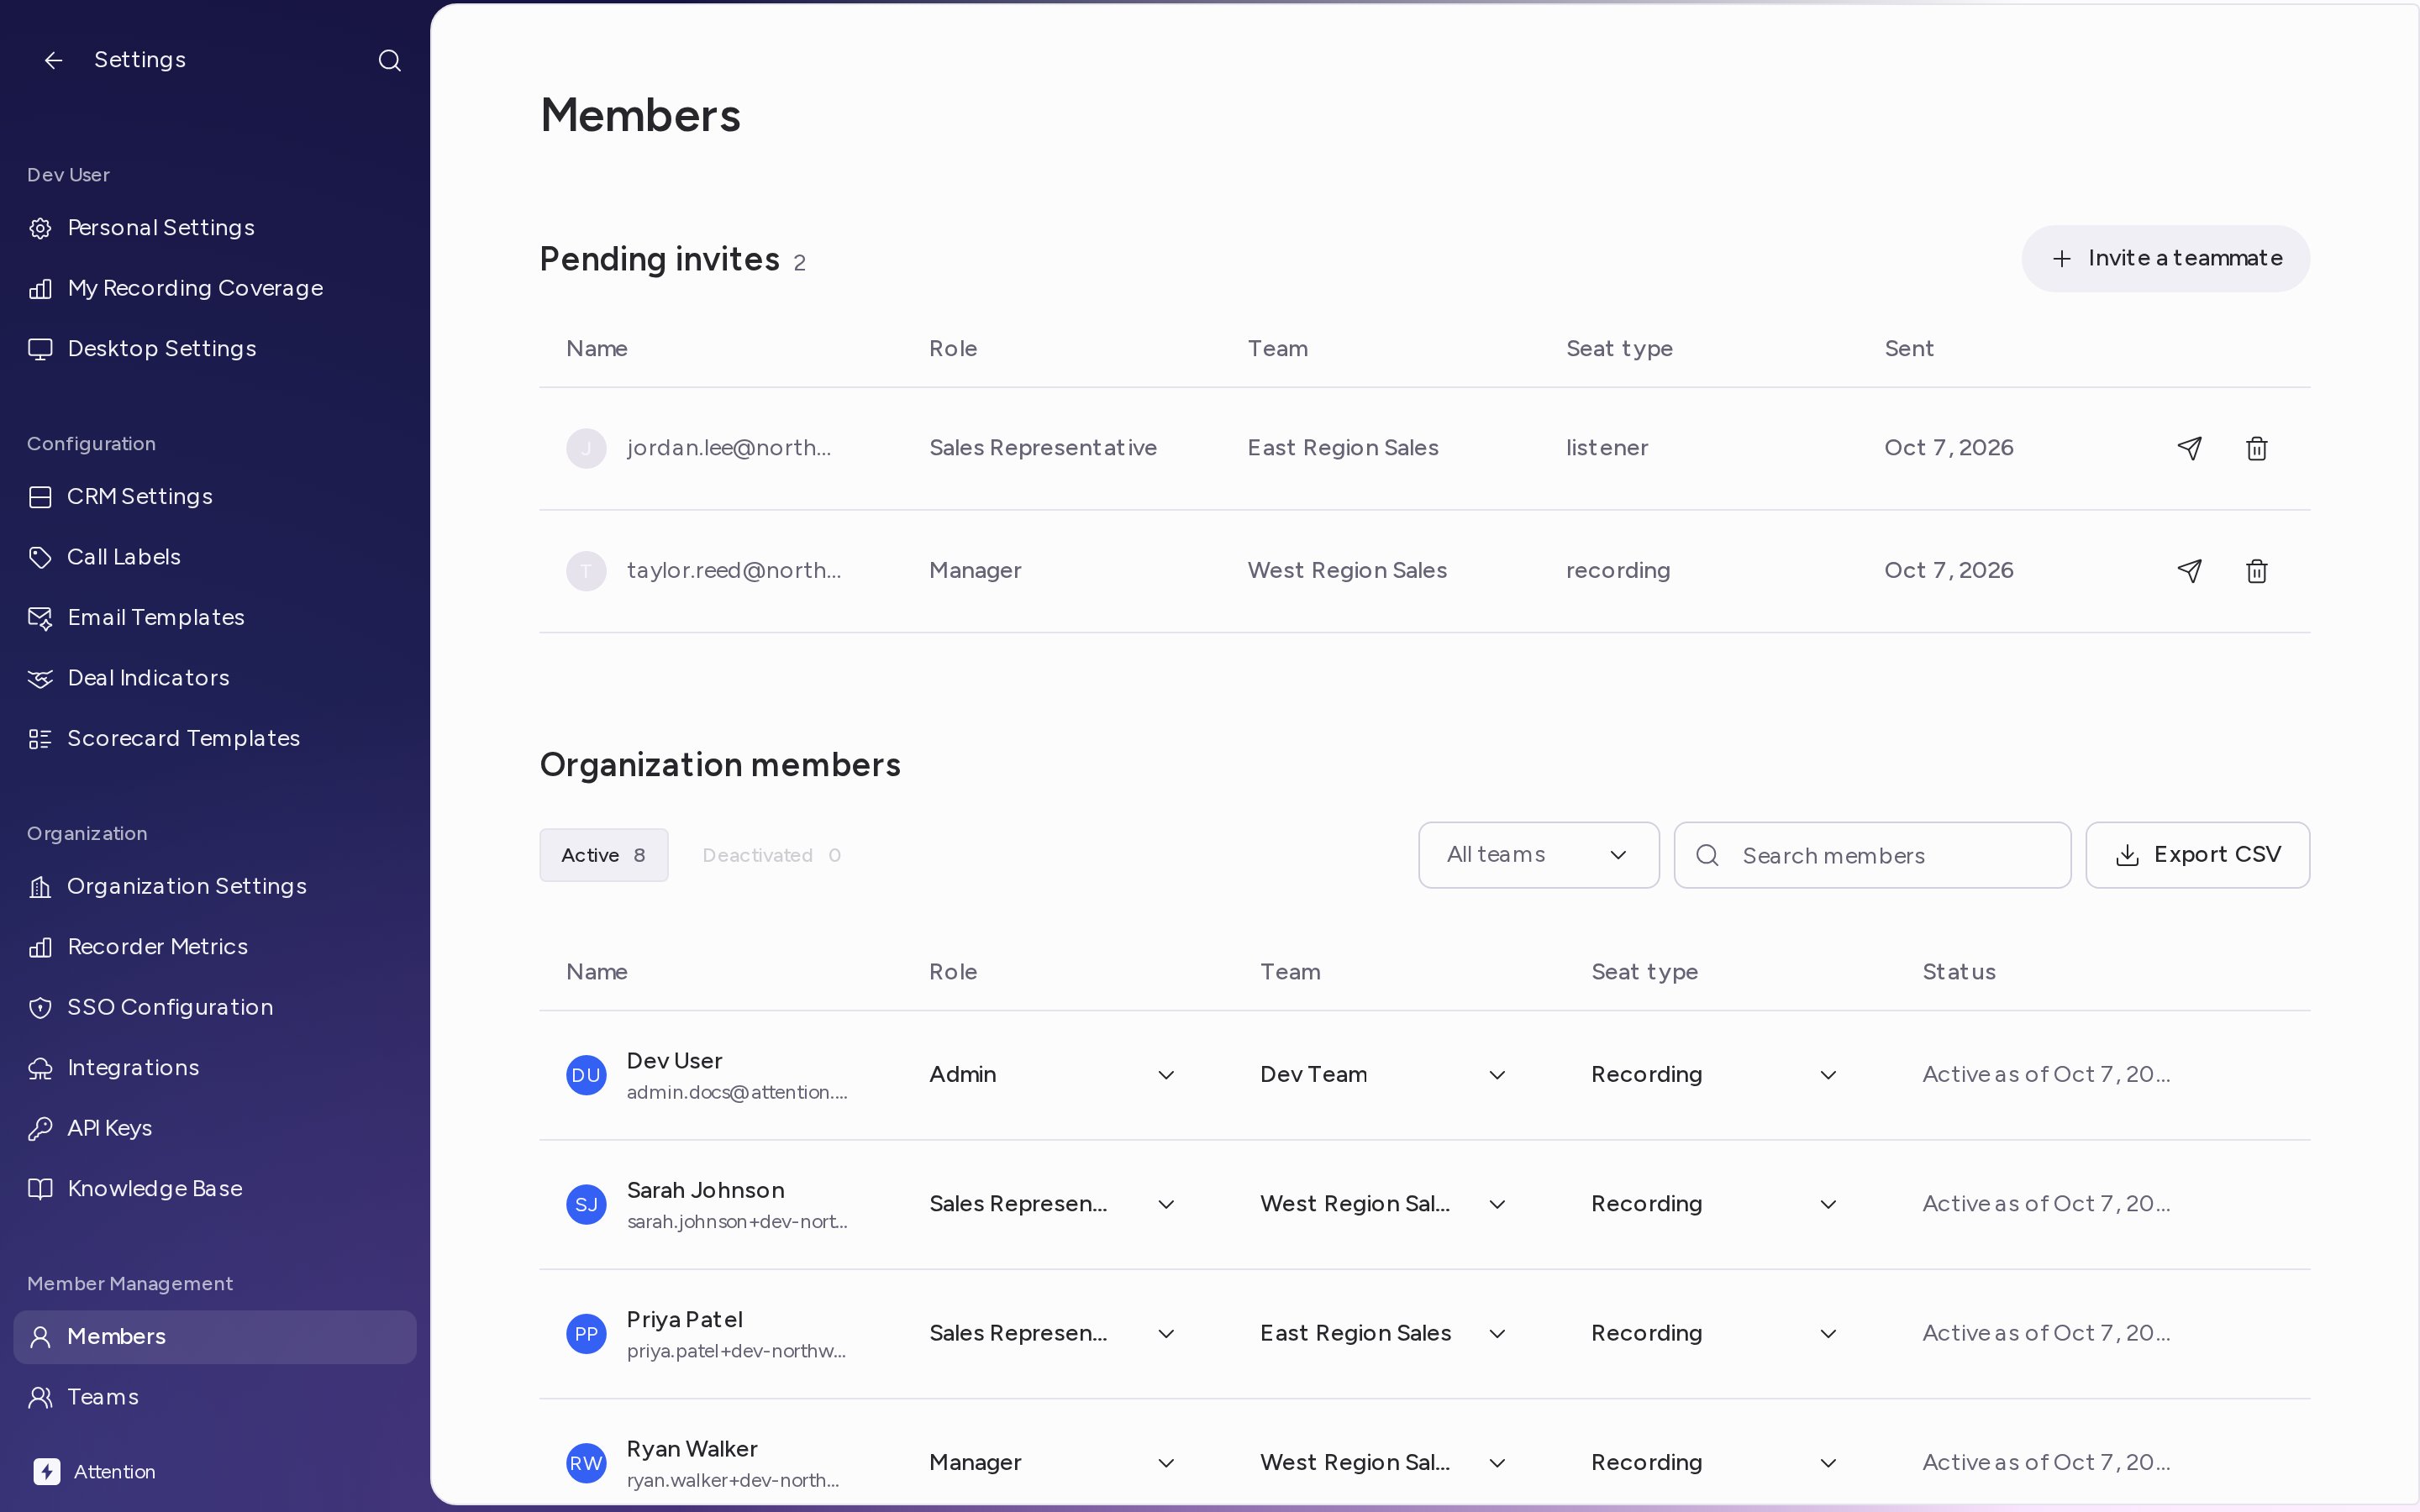
- In Attention, click your name at the bottom of the sidebar, then Settings.
- Under Member Management, click Members.
Invite teammates
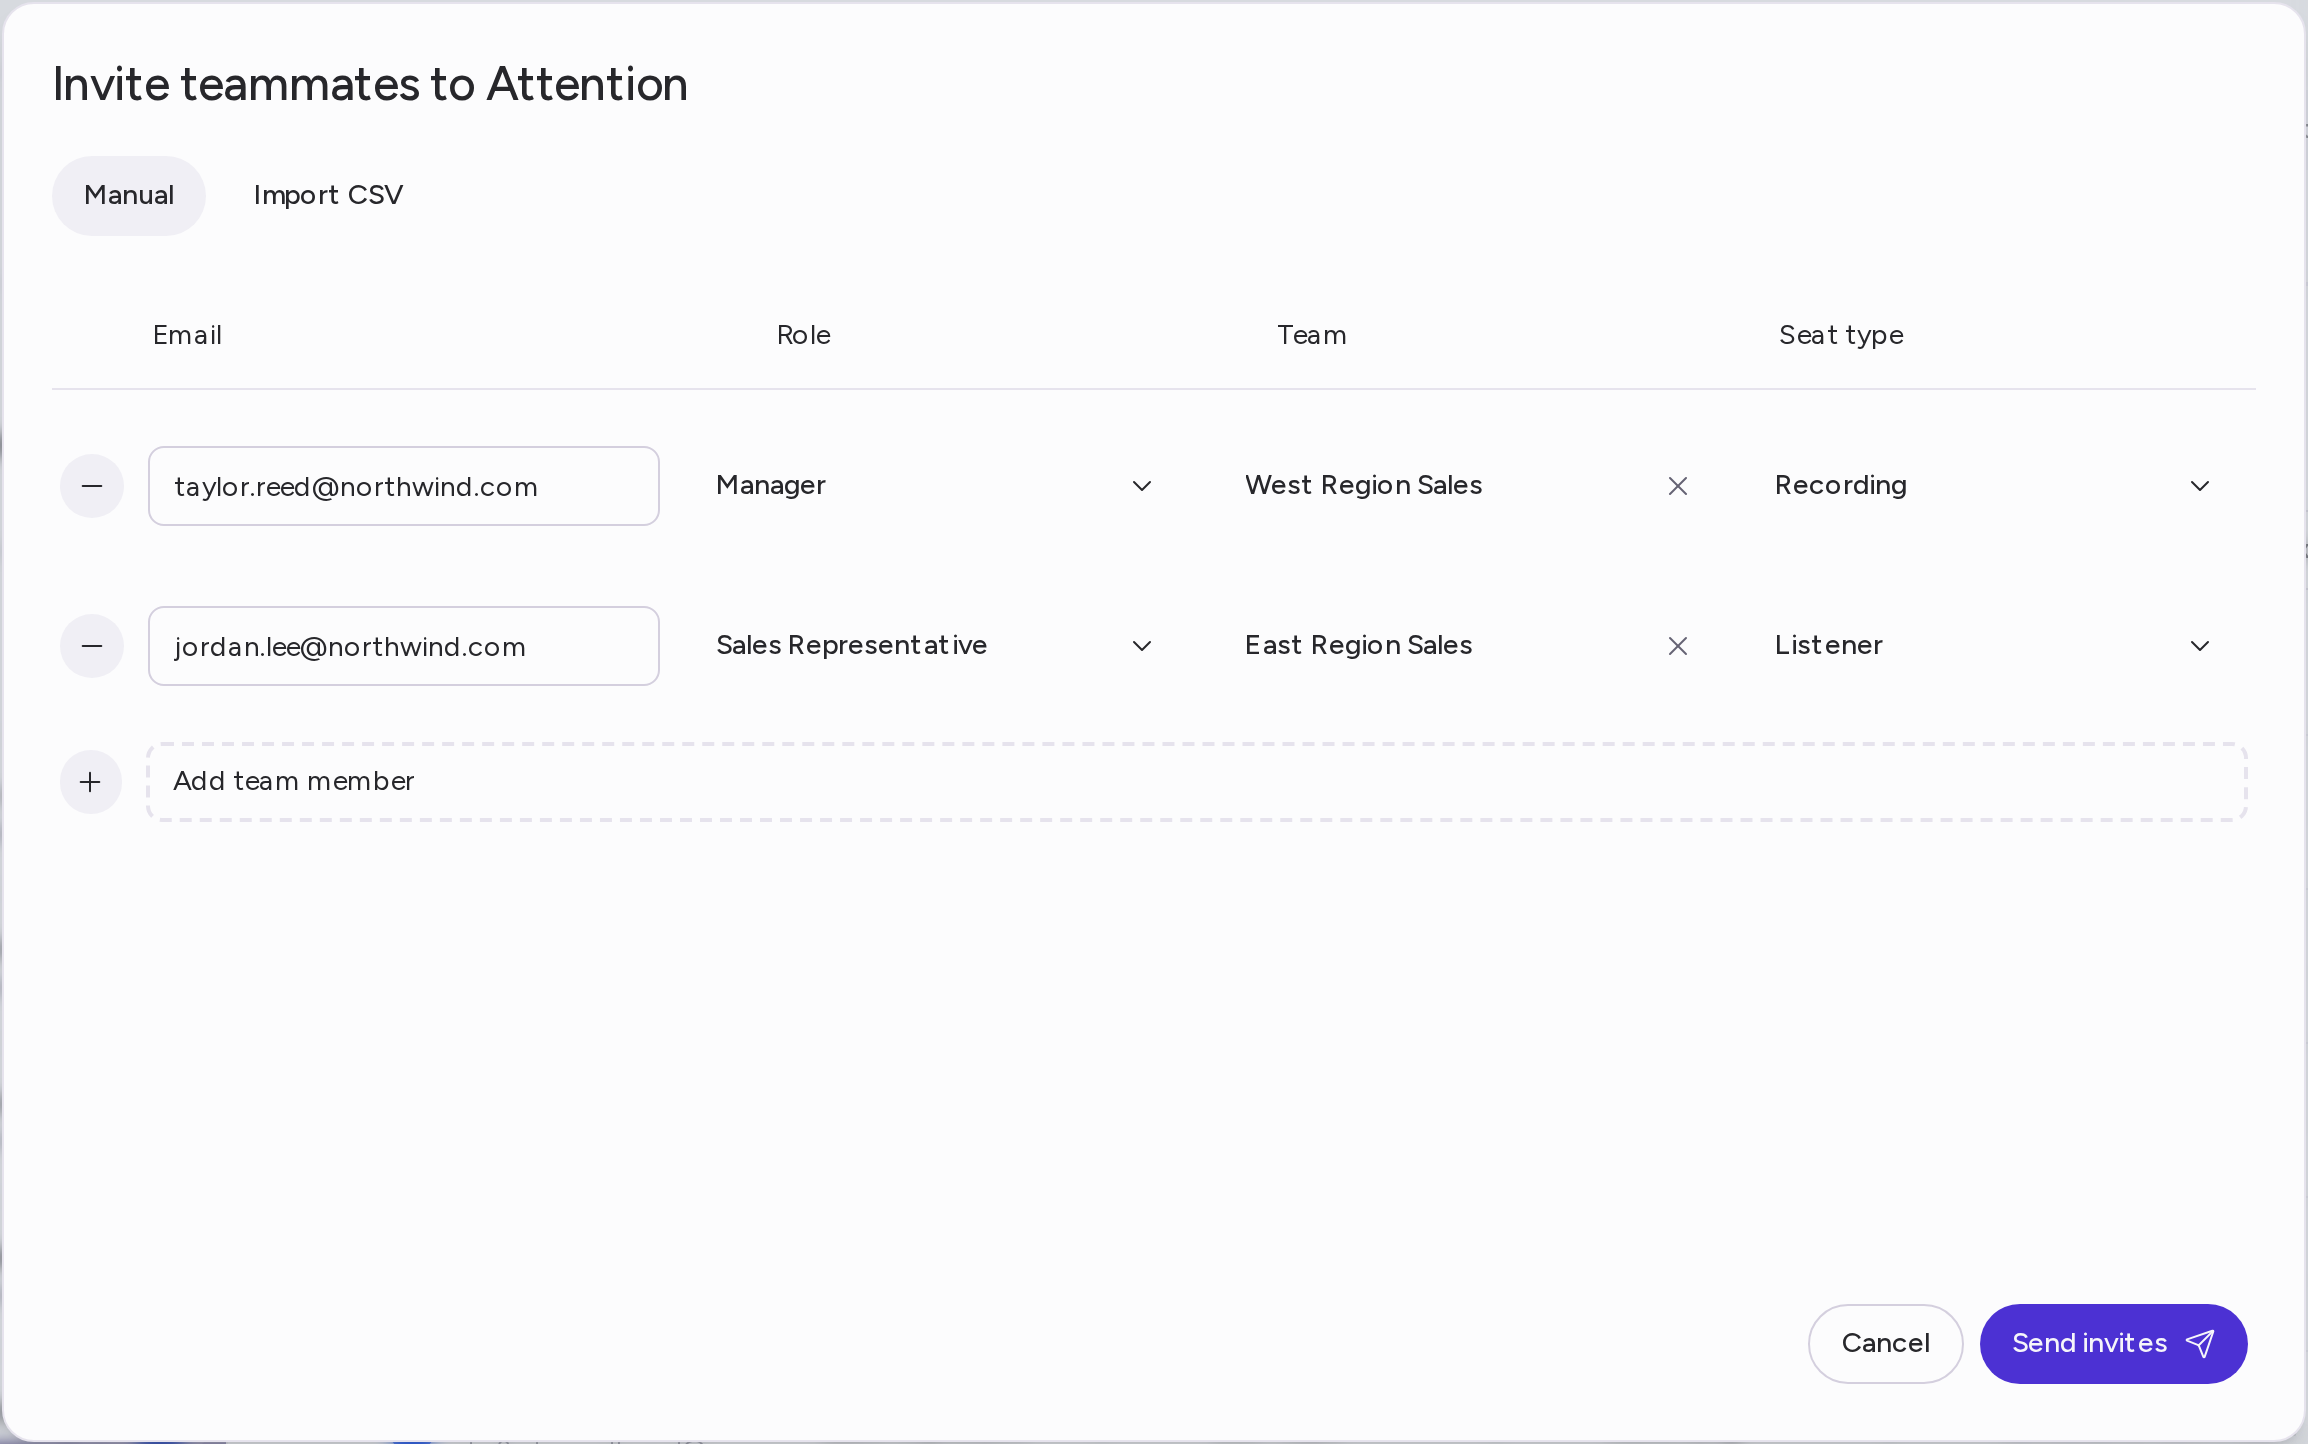
- In Pending invites, click Invite a teammate. The Invite teammates to Attention dialog opens on the Manual tab.
- For each person, fill in:
- Role
- Team
- Seat type: Listener or Recording
- To invite more people at once, click Add team member to add a row. To remove a row, click the − button next to its email.
- Click Send invites.
Import invites from a CSV
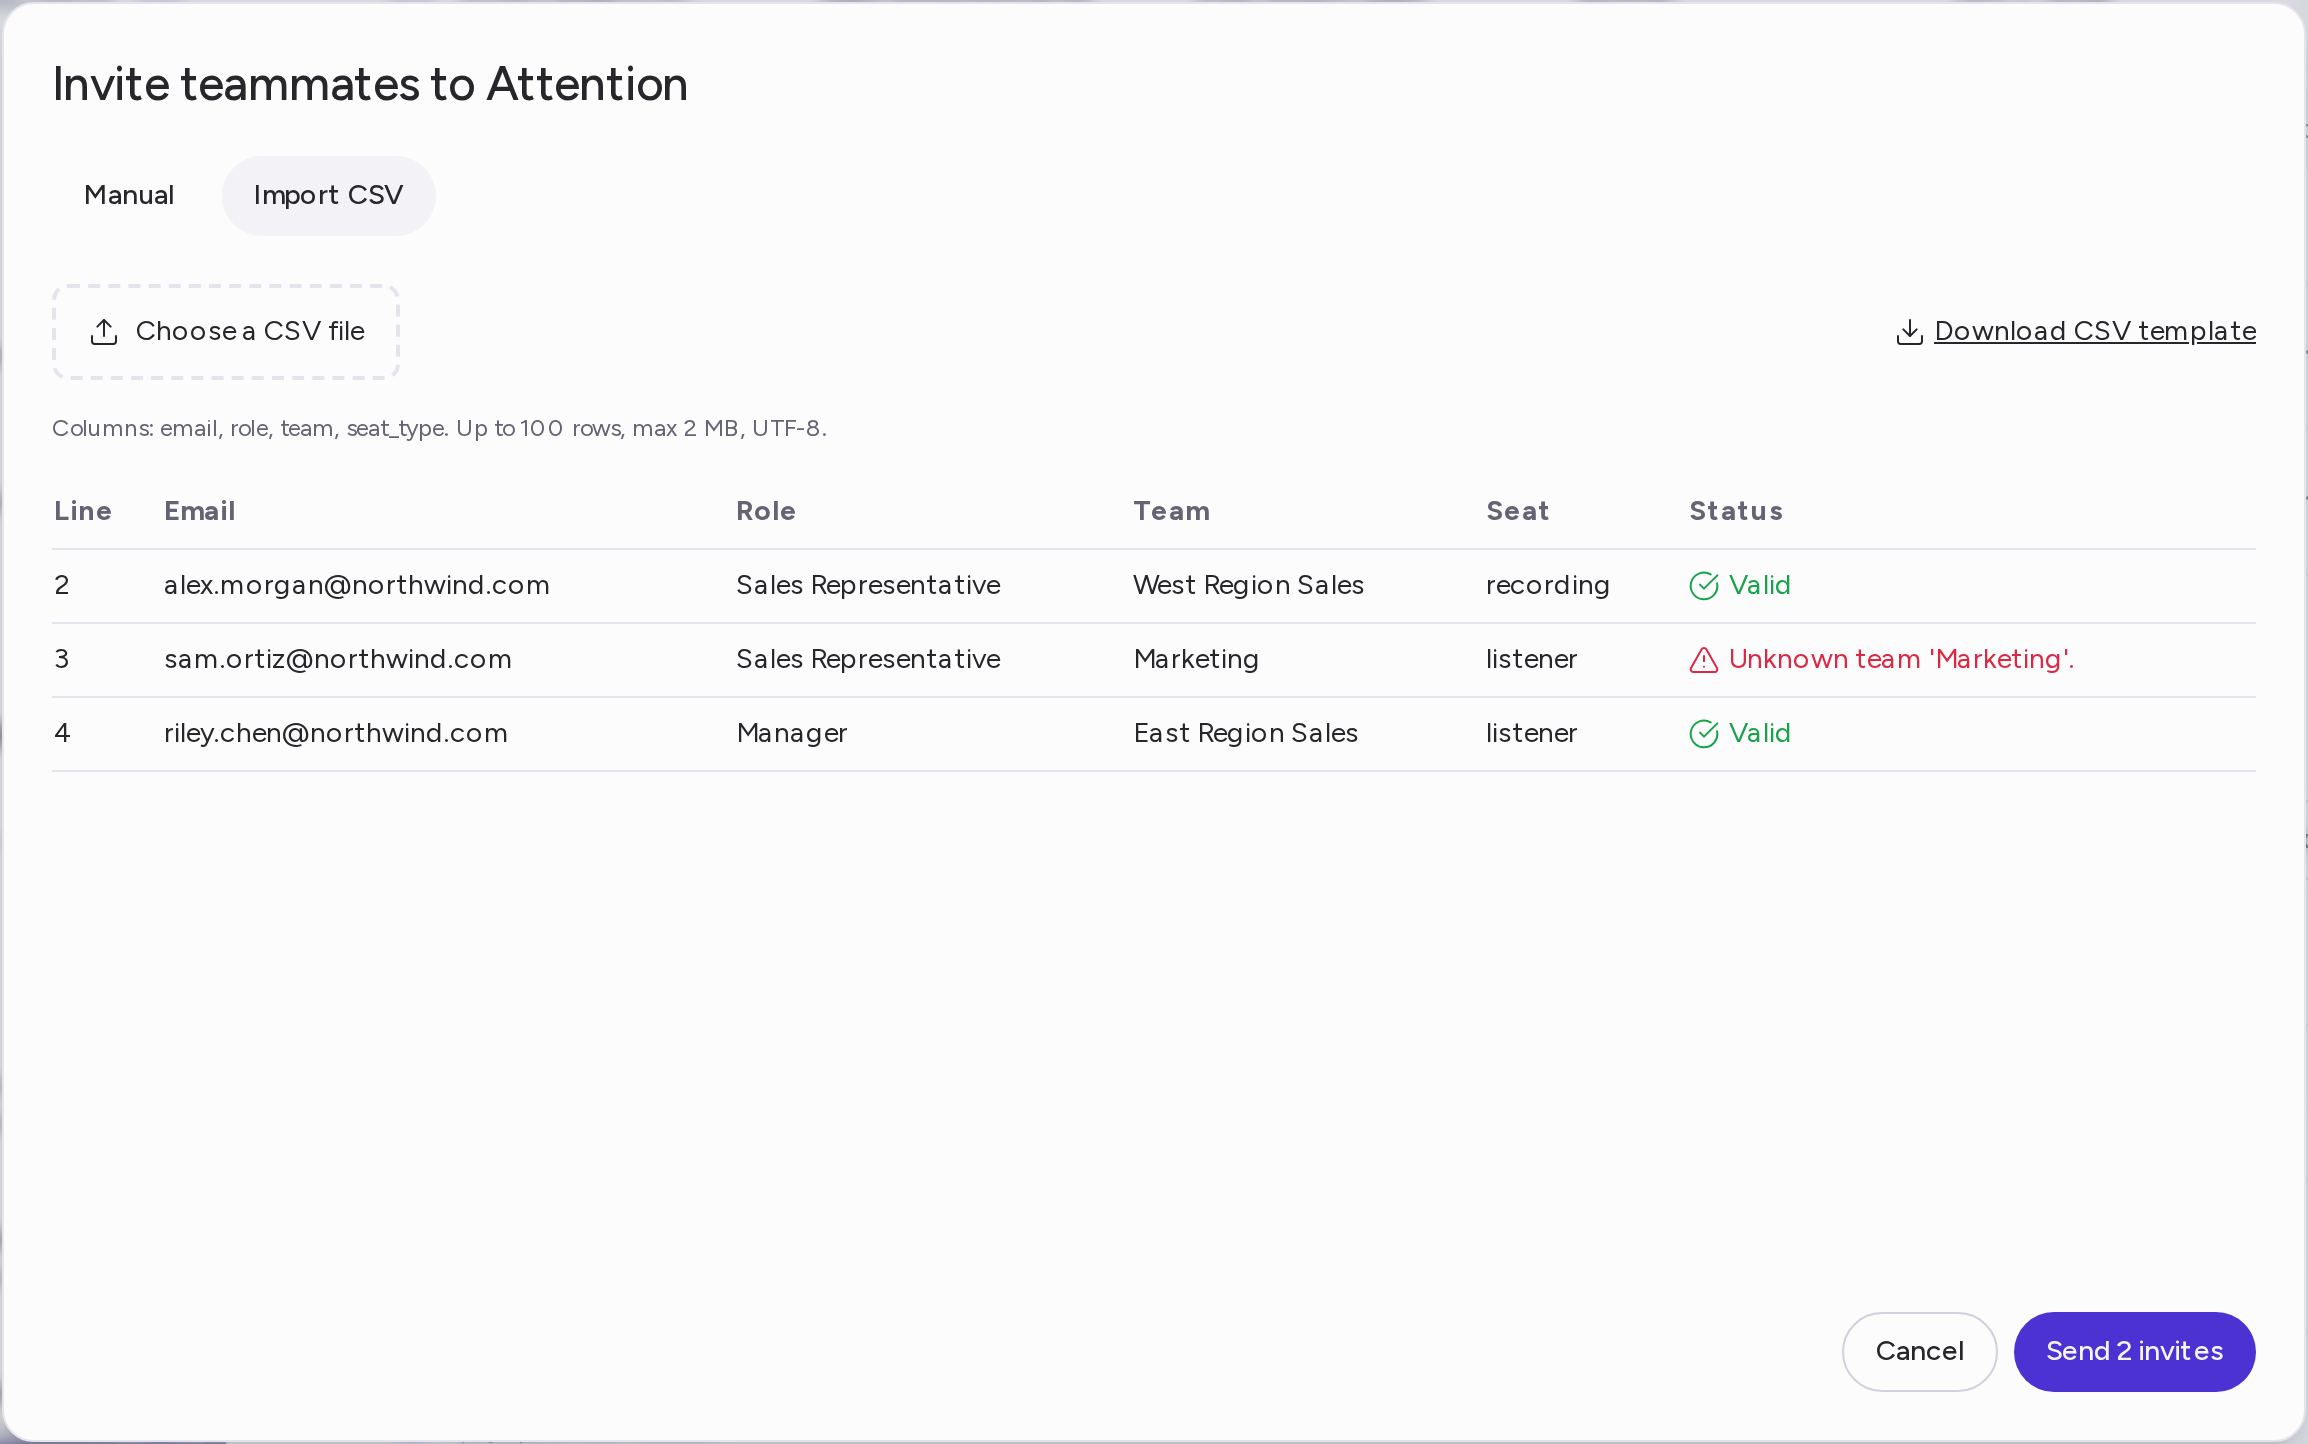
Use a CSV file to invite up to 100 people at a time.- Click Invite a teammate, then open the Import CSV tab.
- Click Download CSV template. The template has four columns:
email,role,teamandseat_type. - Fill in one row per person:
- email, role and team are required. Use the role and team names exactly as they appear in your workspace.
- seat_type is
listenerorrecording. If you leave it empty, the person gets a Listener seat.
- Save the file as a UTF-8 CSV (up to 2 MB), then click Choose a CSV file and select it.
- Review the preview. Valid rows show Valid; rows with a problem, such as an unknown team, say what to fix.
- Click Send invites. The button shows how many valid rows will be sent; rows with a problem are skipped.
Manage pending invites
Each row in Pending invites shows the email, role, team, seat type and the date the invitation was sent. On the right of each row:- Resend invitation (the send icon): sends a new invitation email. The link in the previous email stops working. Confirm with Resend invitation.
- Delete invitation (the trash icon): cancels the invitation. Confirm with Delete invitation.

Change a member’s role, team or seat
In Organization members, change a member’s role, team or seat type directly in their row. See Teams, Roles & Seats for what each option means.Deactivate a member
- In Organization members, on the Active tab, hover over the member’s row and click the ⋮ menu at the end of it.
- Click Deactivate.
- Click Deactivate member to confirm.

Reactivate a member
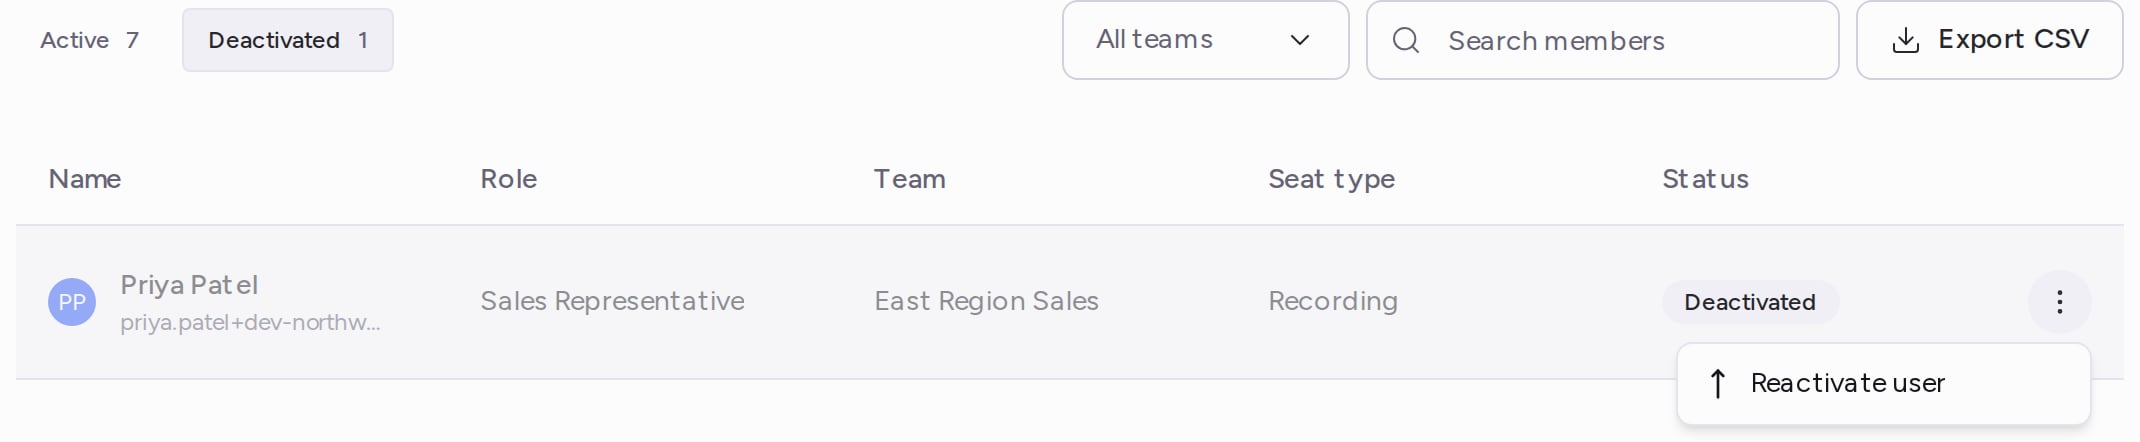
- In Organization members, open the Deactivated tab. Deactivated members show a Deactivated badge.
- Hover over the member’s row, click the ⋮ menu, then click Reactivate user.
- Click Reactivate member to confirm.
Need help? Contact support@attention.com.