You must be an Attention Admin to be able to manage CRM integrations, including Salesforce.Likewise, you must be a Salesforce Admin or have equivalent privileges to be able to add the Attention integration to Salesforce.
Walkthrough
To enable the Attention - Salesforce integration:- Click on your name on the top left corner.
- Select ⚙️ Settings from the dropdown.
- In the Settings page, select Integrations on the left sidebar.
- Select ➕ Add integration on the top right corner.
- Select Salesforce in the New Integration pop-up.
- A new tab will open, prompting you for your Salesforce domain (e.g.
my-organization.my). Select Continue when you’ve done so. - You will be taken automatically to Salesforce, where the OAuth flow will start.
- Log into Salesforce when prompted.
- When prompted to allow access to Attention SFDC Integration, select Allow.
Required Salesforce access scopes
Attention requires the following authorization scopes to be able to establish 2-way sync with your Salesforce instance.| Scope | Purpose |
|---|---|
| api | Gives Attention access to the Salesforce REST API, e.g. so that it can auto-sync CRM fields |
| Allows Attention to access the identity URL service using your email as identifier | |
| offline_access | Allows Attention to refresh tokens for long-lived access without re-authentication |
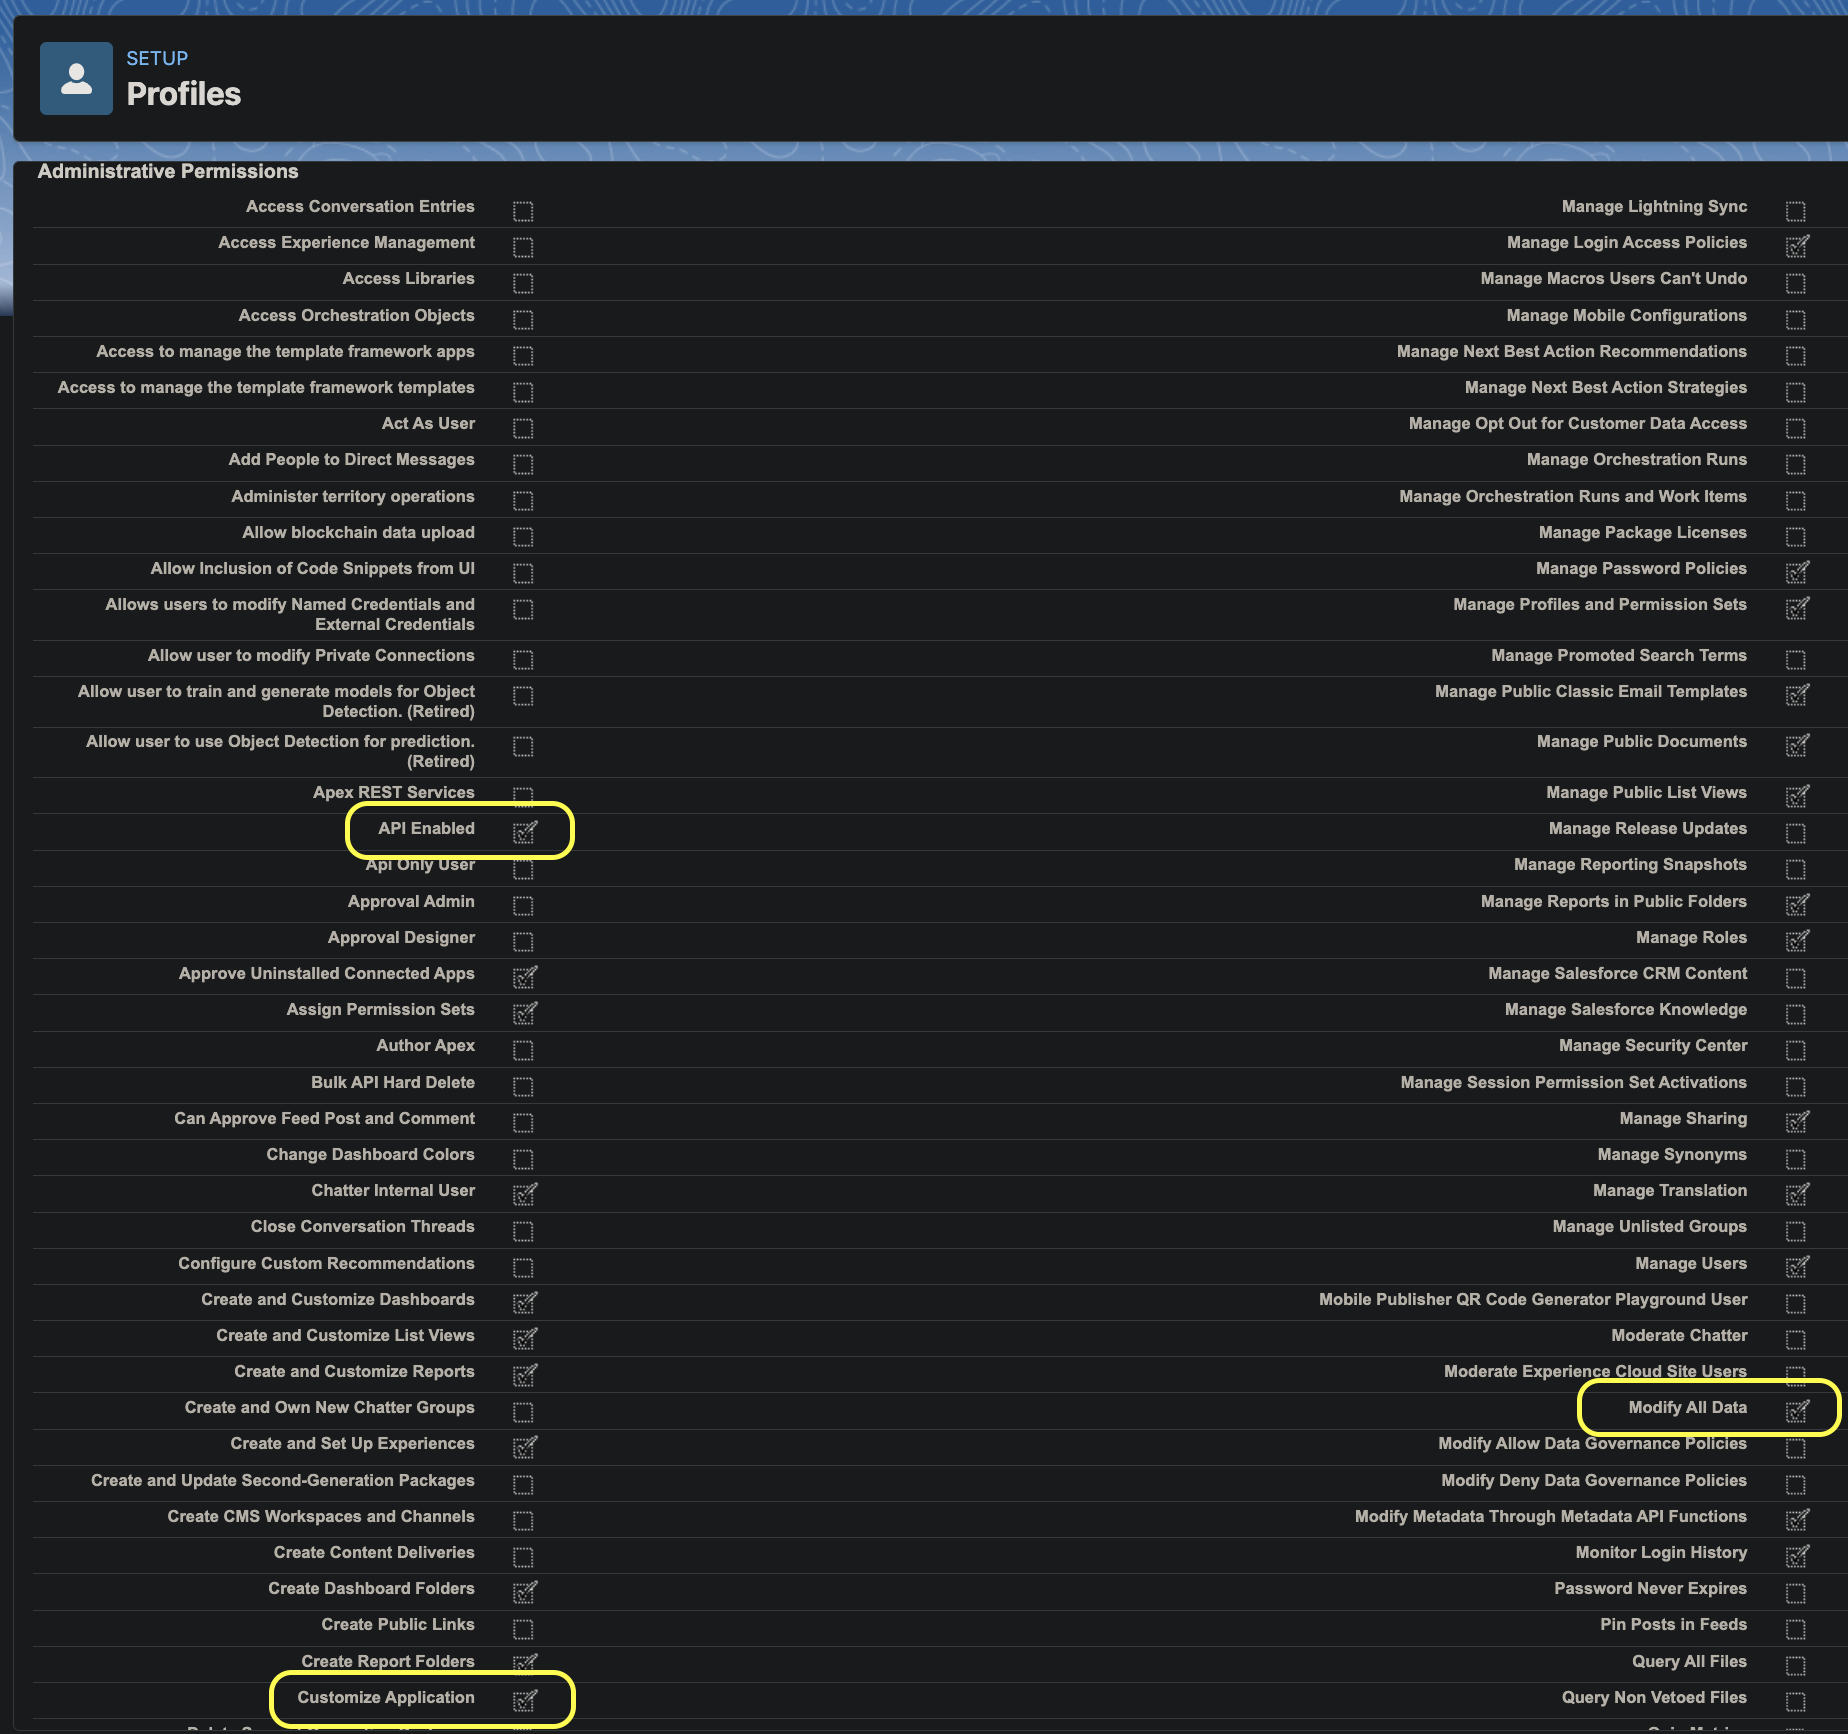
Required Salesforce user permissions
Attention’s permissions are limited by the authenticated Salesforce user’s actual permissions, even if broader access scopes are configured. TwoAdministrative Permissions are required by Attention:
- API Enabled
- Customize Application
- Modify All Data
- Navigate to your Salesforce instance page.
- In the ADMINISTRATION section on the left menu, click on the Users accordion to expand the available options.
- Select Profiles.
- Choose your profile from the list.
- In the Administrative Permissions section, look for API Enabled, Customize Application and Modify All Data.
- Check the boxes on the right side of each permission to enable them.